Leave Types
Introduction
Organization can define, customize, and manage various leave types to align with organizational policies. This flexibility allows for tailored configurations, such as enabling attachments, setting carry-forward rules, and defining leave duration preferences.
Accessing the Leave Types Page
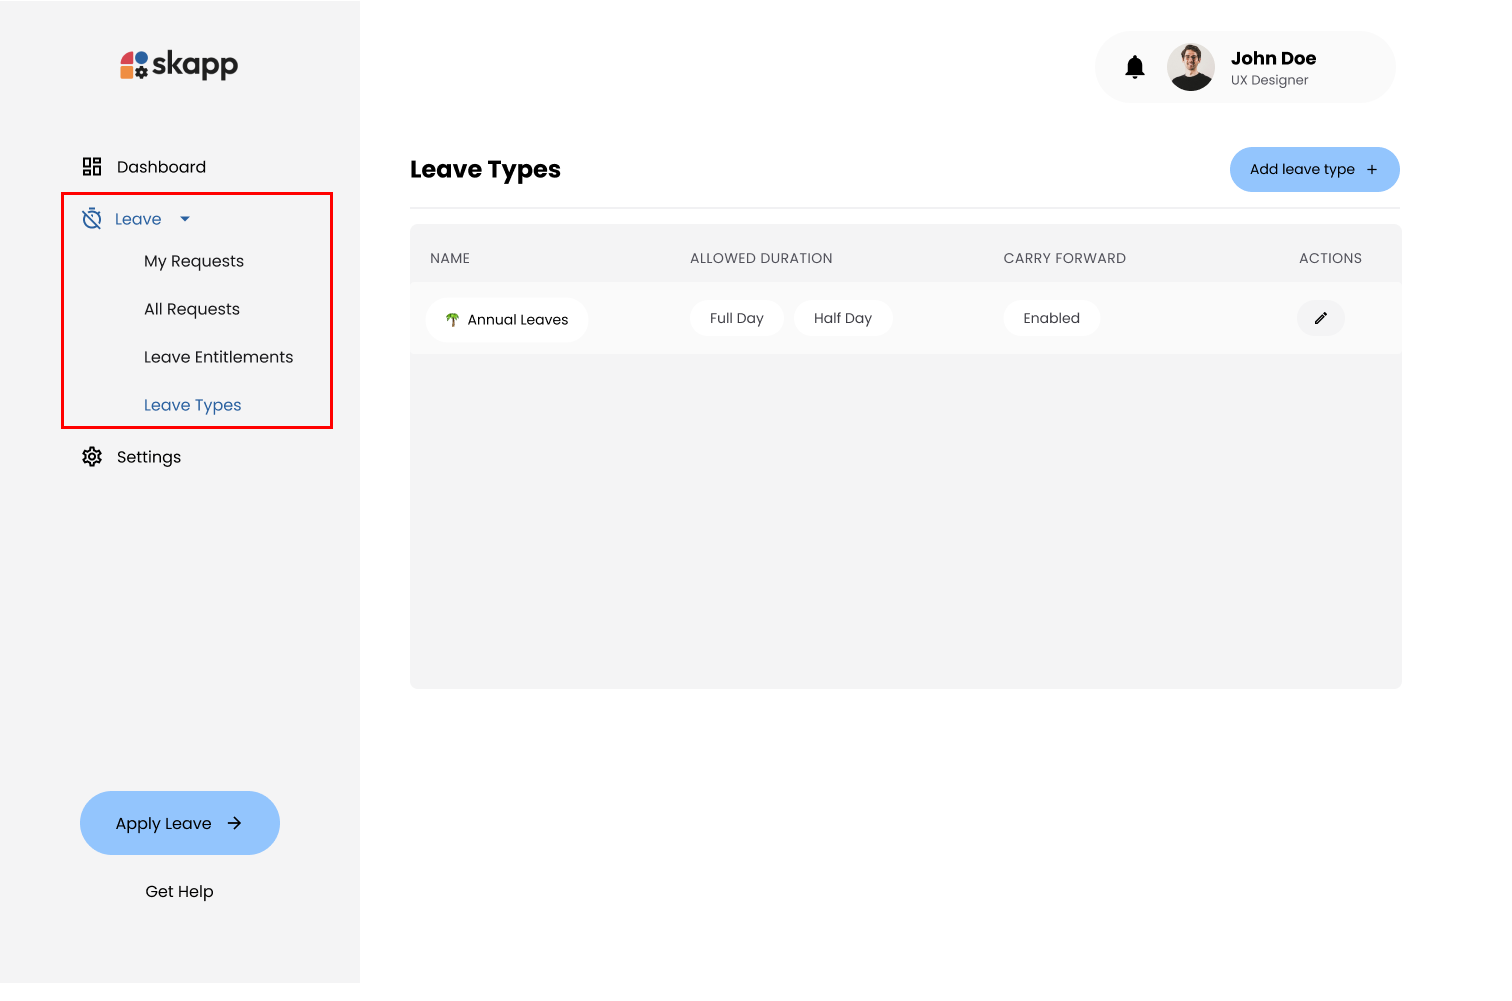
- Click on the Leave option in the main navigation bar.
- Click on the Leave Types sub-menu option under the Leave module.
info
Users with the Super Admin & Leave Admin roles can manage leave types.
Adding Leave Types
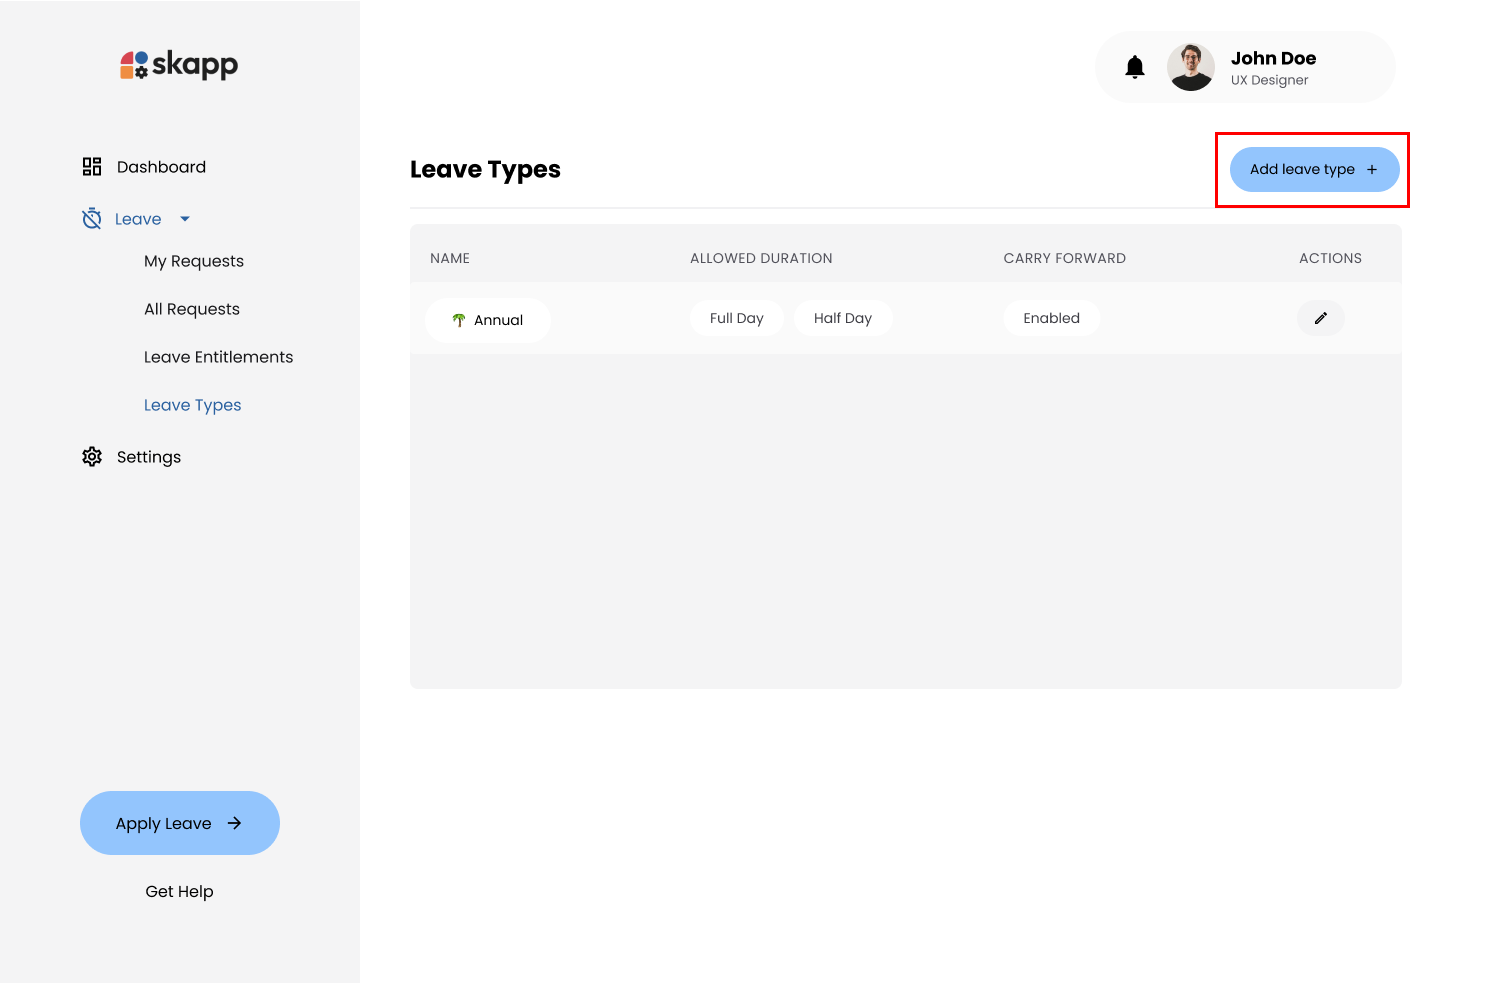
Step 1: Click on Add Leave Type Button
- On the Leave Types page, click the Add Leave Type button to open the Add Leave Type page.
Step 2: Enter Leave Type Details
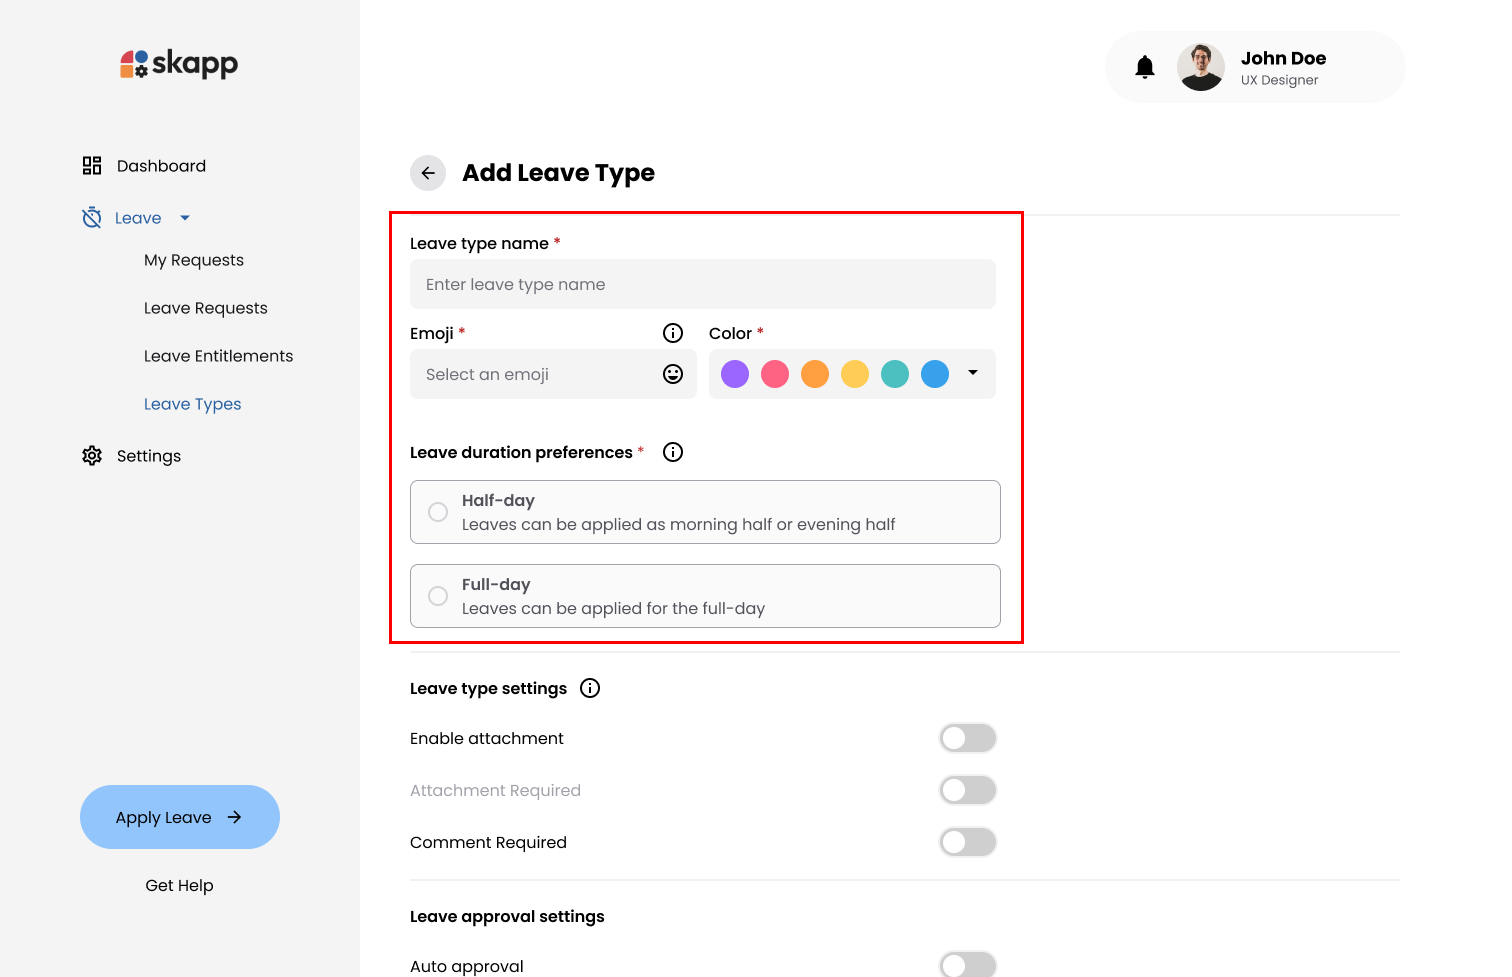
Leave Type Name
- Mandatory field
- The name of the leave type as it will appear throughout the system.
- Must be unique within the organization.
Emoji
- Mandatory field
- Click on the Emoji icon to open a dropdown.
- Choose an emoji that best represents the leave type.
Color
- Mandatory field
- A color code for visual distinction in analytic graphs.
- Select one of the 12 available colors.
Leave Duration Preference
- Mandatory field
- Specifies whether the leave type can be taken as full days, half days, or both.
- Full Day: Leave can only be applied for full days.
- Half Day: Leave can only be applied for half days.
- Both: Leave can be applied for either full or half days.
Enable Attachment
- Optional field
- Enabling Allows employees to attach documents when applying requests for this leave type.
Attachment Required
- Optional field
- Specifies whether attaching a document is mandatory.
- Enabled only if Attachments are enabled.
Comment Required
- Optional field
- Requires employees to add a comment or note.
Auto Approval
- Optional field
- Automatically approves leave requests of this type.
Enable Carry Forward
- Optional field
- Allows unused leave days to be carried over to the next leave cycle.
note
Check Leave Carry Foraward
Maximum Carry Forward Days
- Mandatory field only if carry forwarding is enabled.
- Sets the maximum number of unused leave days to carry forward.
Carry Forward Expiration
- Mandatory field only if carry forwarding is enabled
- Defines the expiration date for carried forward leave days.
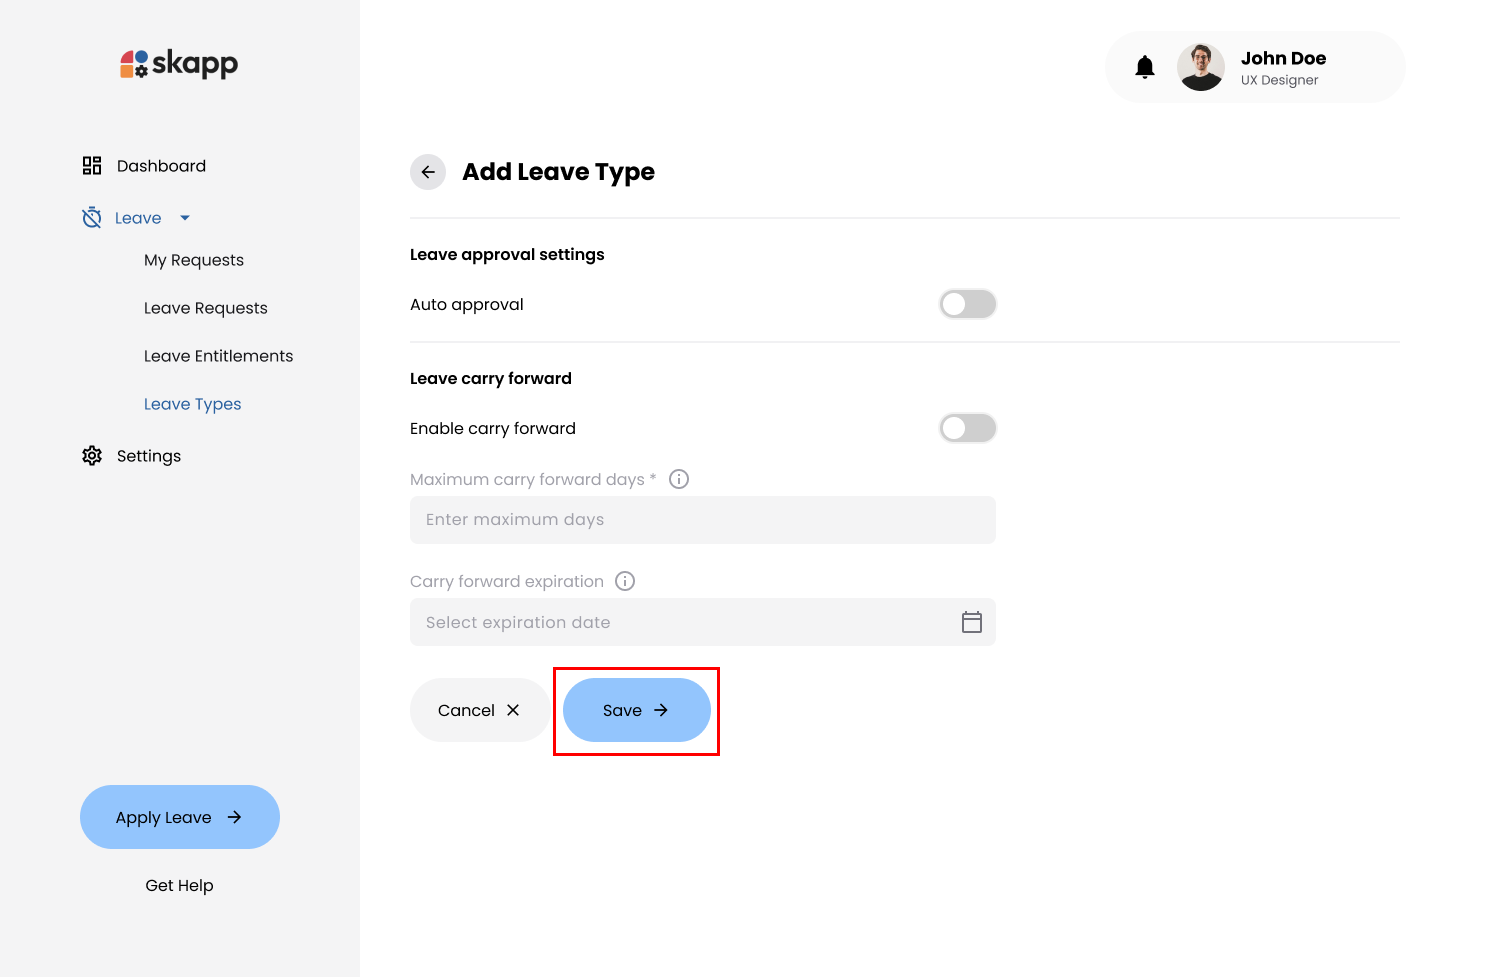
Step 3: Save the Leave Type
- The Save button remains disabled until all mandatory fields are filled.
- Click the Save button to create the leave type.
Editing Leave Types
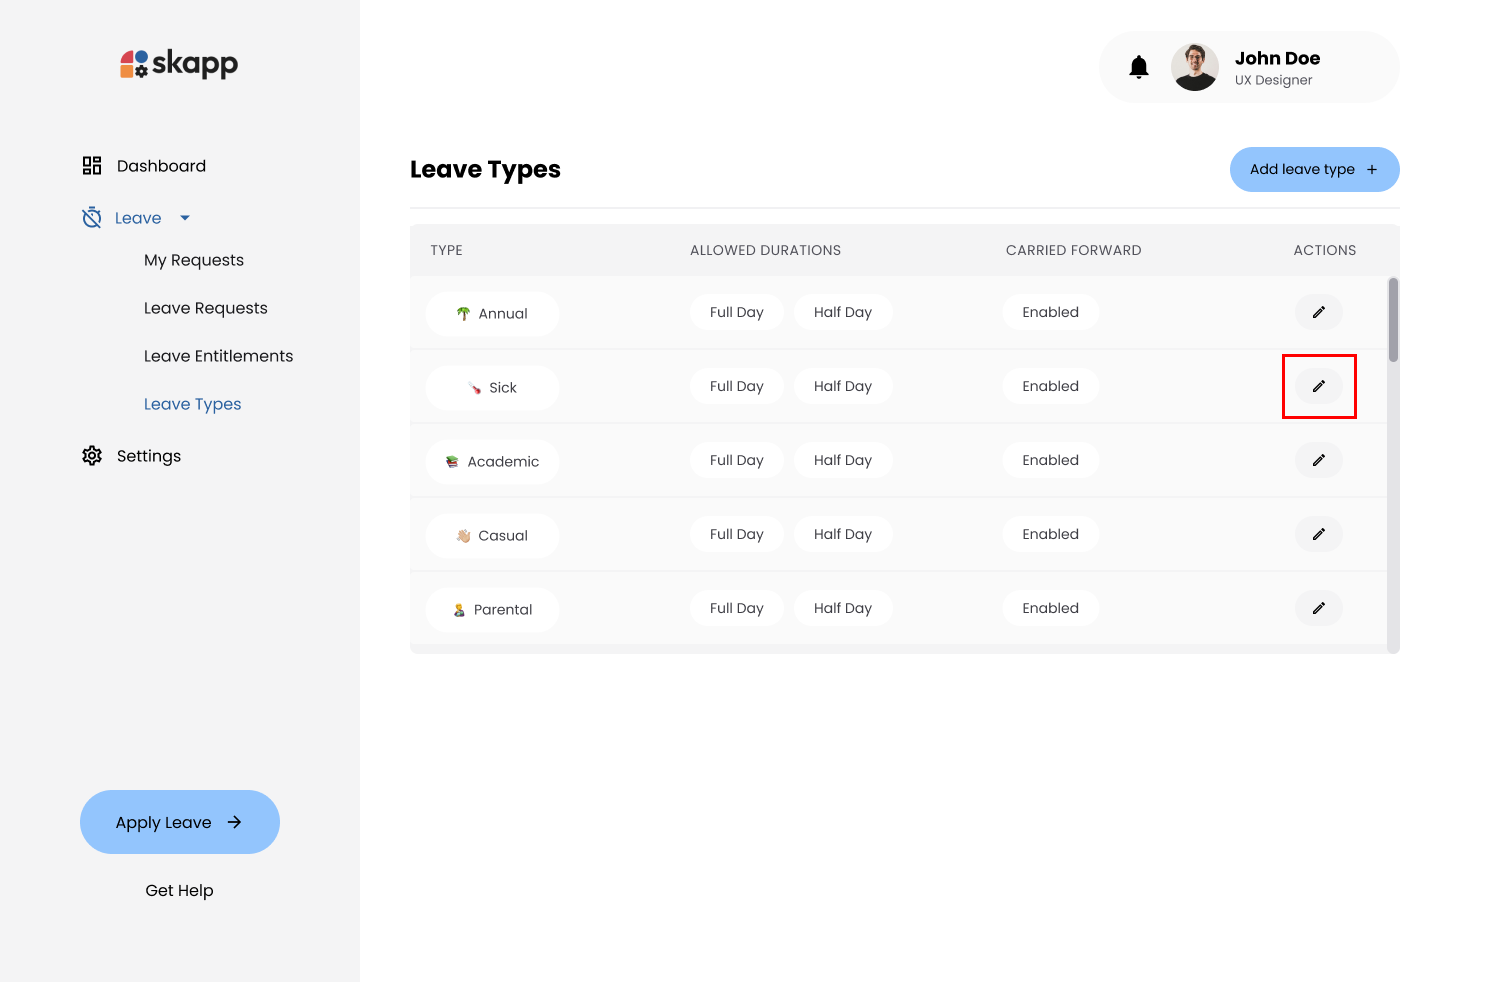
Step 1: Click on Edit Leave Type Button
- On the Leave Types page, locate the leave type you wish to edit.
- Click the Edit option under the Action column.
Step 2: Edit Leave Type Details
- Modify the details as needed, following the same guidelines as when Adding a leave type.
info
- Changes to Leave Type Name, Emoji, and Color will reflect in existing leave requests.
- Changes to Attachment or Comment Settings apply only to future requests.
Deactivating a Leave Type
- Deactivating a leave type makes it unavailable for future leave requests.
- Users won't be able to see the leave type cards in the My allocation section if they had entitlements under the deactivated leave type.
Step 1: Deactivate Leave type
- Toggle the Active/Inactive switch to Inactive.
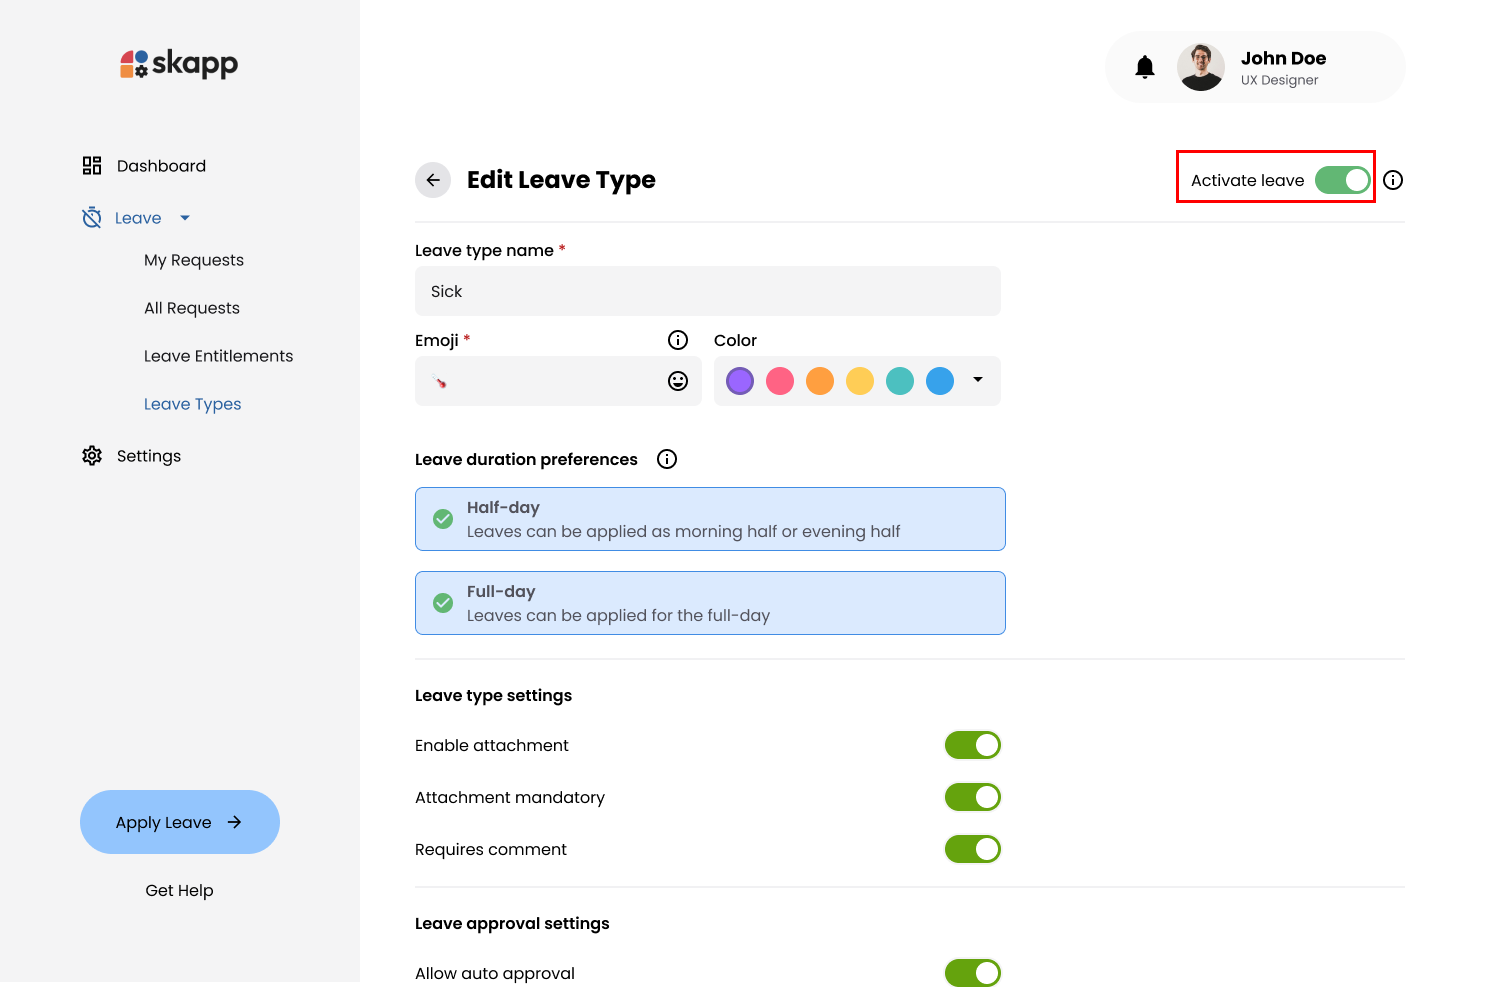
- Click the Save button.
Step 2: Confirm Deactivation
- Click on Confirm and Save butoon to deactive the leave type.
Activating a Leave Type
- Reactivating a leave type makes it available again for requests if they have entitlments for that leave type.
Step 1: Reactivate Leave type
- Toggle the Active/Inactive switch to Active.
- Click the Save button.
Step 2: Confirm Deactivation
- Click on Confirm and Save butoon to reactivate the leave type.